When starting to develop on NetSuite it can be a pretty frustrating experience because the documentation reads more like marketing speak than a recipe guide of how to do something.
For the most part, the easiest way to set a default value in NetSuite is to use a workflow. There are some record types that can only be updated with code. I haven’t ever run into it, but I have heard there are other record types that aren’t editable at all through automation.
Steps To Set it Through a Workflow
When signed in with an Administrator role, workflows are available in the Customization center under workflow.
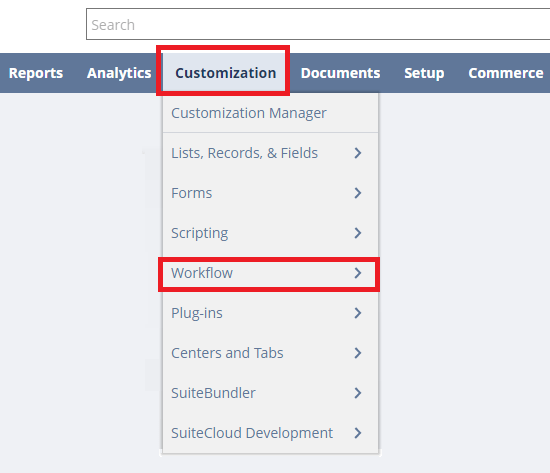
After clicking the “Create New” button you should see a page that loads and looks like this.
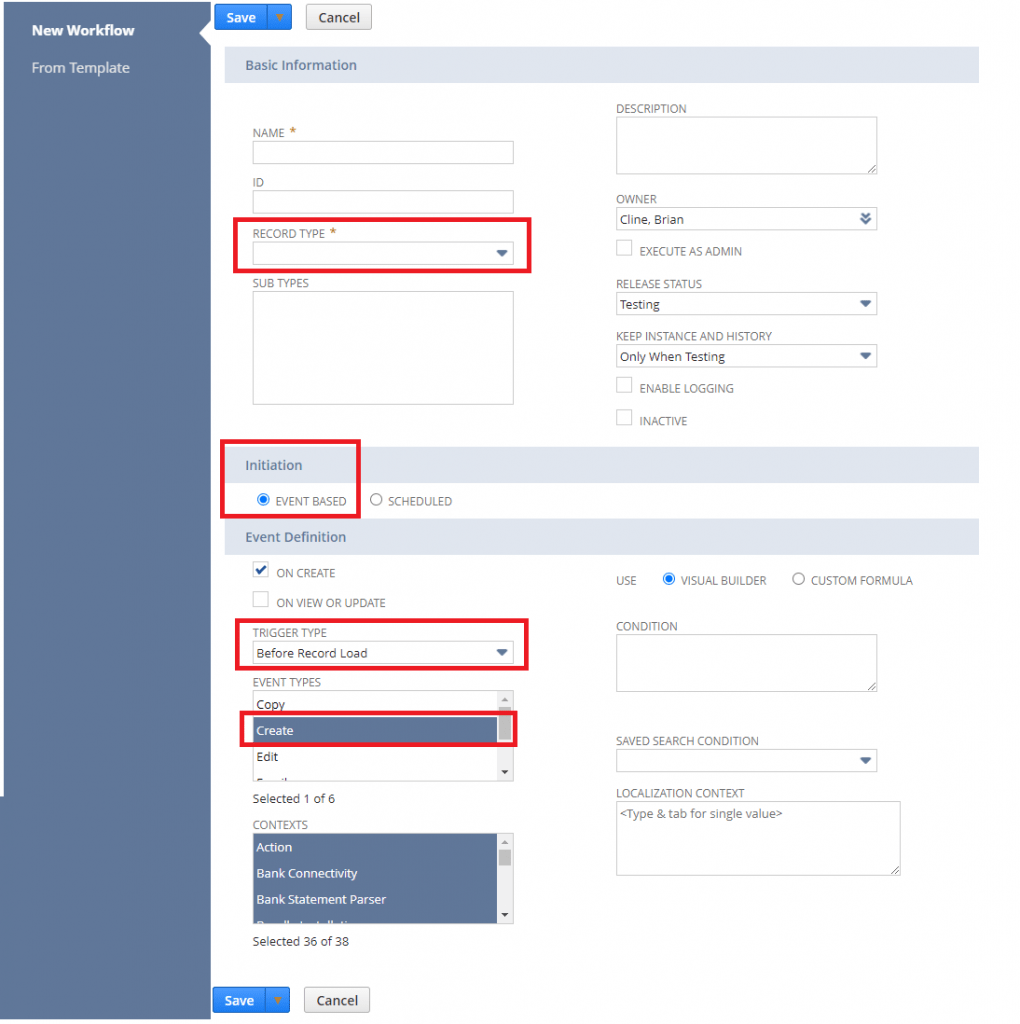
The first step is to enter a name, this should be something that tells you what you are going to use it for. For example, if I was setting a Default field on a Customer I would probably call it “Set Default Fields on Customers”.
Next Choose a Record Type – if you don’t see the record type you want to set a default for then you will need to jump to the code method.
Next set the Trigger Type to be “Before Record Load”. “Before Record Load” happens on the server side before the page and data are sent to the user’s web browser meaning it happens before the user has actual access to the record. When the page loads the defaults are already set.
Event Types – I usually just set this to “Create”.
Contexts – for the most part I leave these alone because I always potentially want it to fire.
Press Save.
Workflow States
When building workflows, the workflow states are the building blocks. Each state corresponds to a step or stage in the business process. Each state includes specific actions and are connected to other states through transitions.
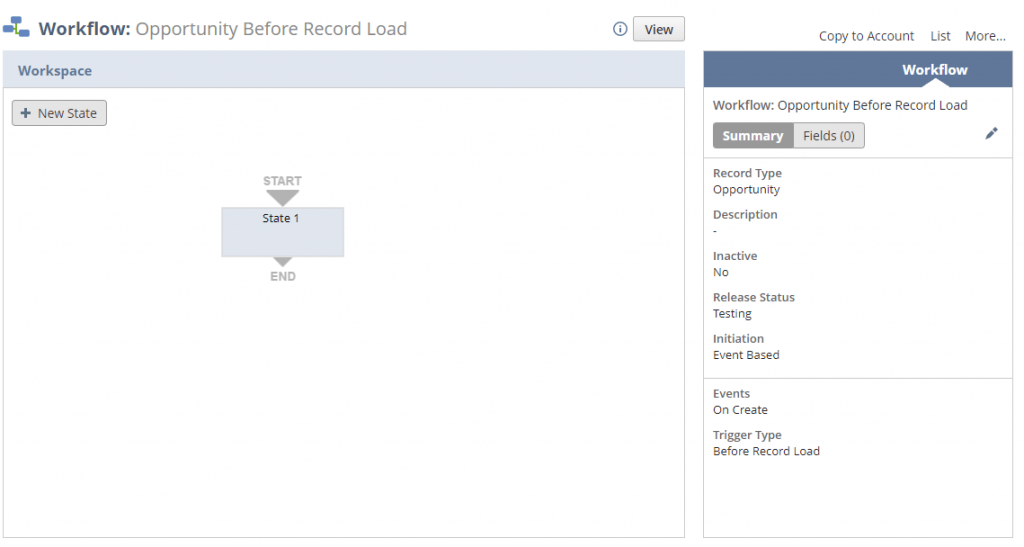
When we click on a state or add a state, we are given the options to set Workflow Actions. Actions are the steps to complete during that state. We can do things like set a field value, send an email, add a button or etc.
Press the “New Action” button to get started.
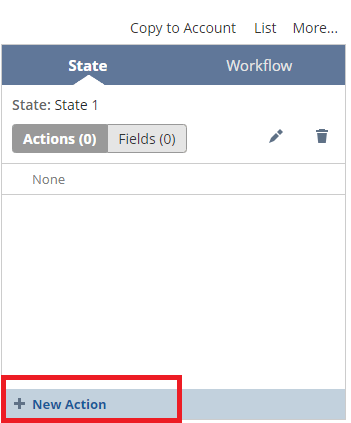
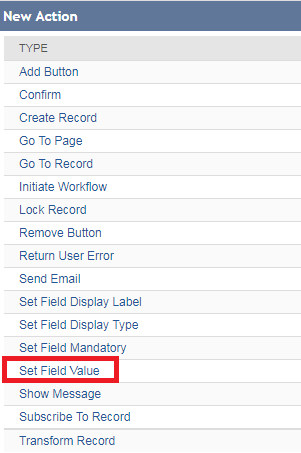
After clicking “New Action” a new menu will load that has a bunch of different items in it. Choose “Set Field Value”.
After a few seconds, a new modal should pop up that allows us to choose the field, and how we are going to set the value. In the parameters section, after you choose a field it will potentially restrict the fields available.
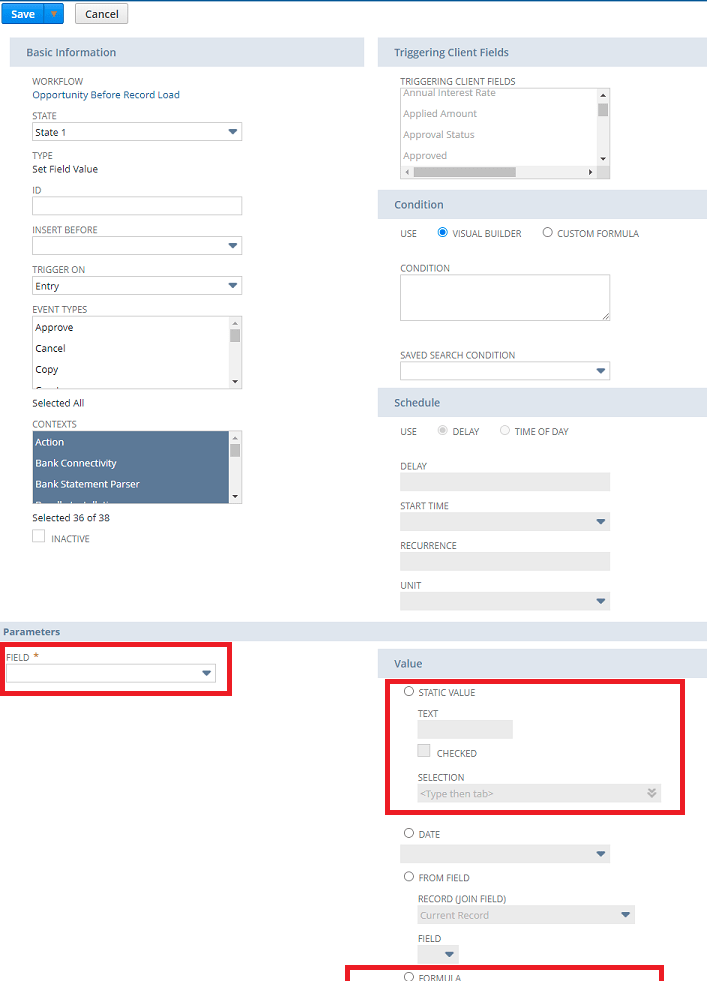
For the most part, I try to use “Static Value”, “From Field” or “Formula” when defaulting a field’s value. A Static Value is great for setting a dropdown list value.
From Field is great when you need to use a value from the Current User to set a value on the record. For example, “Location” is a great one that you probably would want to copy from the User to each type of record they create.
Here’s an example of how I would set the Location if I wanted to set it from the User’s Location. Note: only matching field types will be displayed which helps prevent a lot of errors.
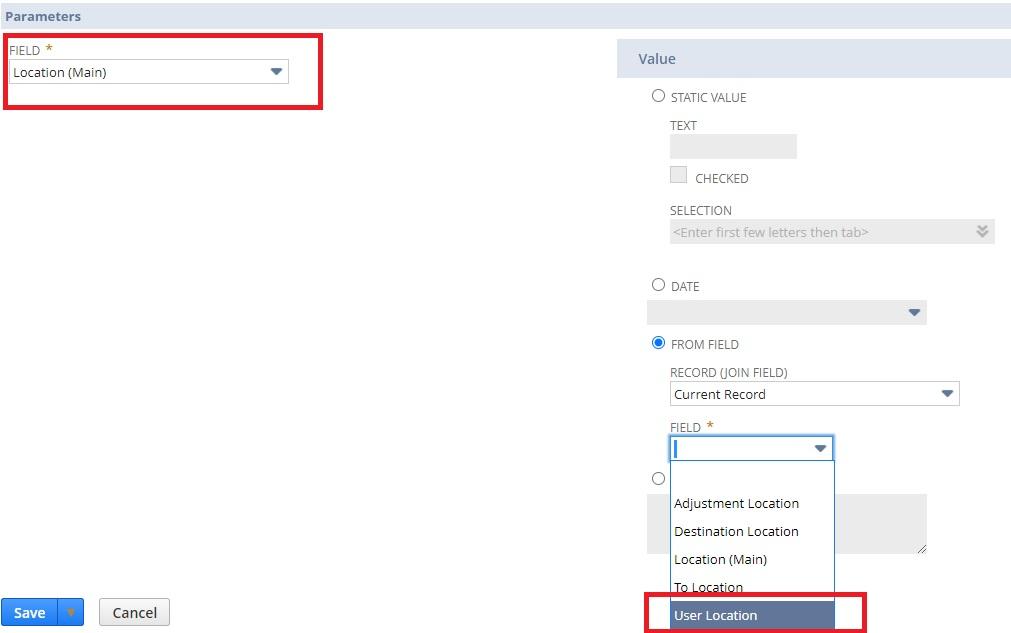
Finally, if I press Save I can see the value now in the Entry list and I can activate it for use by clicking off of the State and clicking the pencil on the Workflow.

I can then change “Release Status” to be “Released” and begin doing my testing. To test, I need to create a new Opportunity.
Steps to Set the Default Value Through a Script
Setting the default fields in the before load of a user event script is recommend for better performance as this will be completed on the server (NetSuite) instead of in the browser.
In the user event script, context will be passed in as an argument with parameters like “type” and “newRecord”. To set a value, we simply use newRecord.setValue({fieldId: YOUR_FIELD_ID_VALUE_HERE, value: “YOUR VALUE”}).
Wrapping It Up
In NetSuite, it’s almost always easier to automate things through clicks and not code. Most of the changes in NetSuite happen through a workflow although there might be cases where you have to unfortunately write code.


