I have worked with serverless technologies like AWS Lambda since early 2016 when I left an established payment gateway and started working on a startup. For those not aware, there’s a lot of reasons to use serverless technologies: fast deployments, automatic scaling, pay per execution pricing, and more.
The Serverless Framework allows us to abstract away quite a bit of the complexity from setting up lambda functions and the necessary events to execute them, especially through the API gateway.
To get started with the Serverless Framework, we need to do the following things:
- Install it globally from the terminal
- Configure Serverless Framework Credentials
- Add it as a dependency to our project
- Set up the serverless.yml file
Setting up our local environment
The first thing we need to do is install the serverless framework globally. On windows you may need to start a command prompt with admin privileges. Once at the terminal we need to run “npm install -g serverless”
After that succeeds we need to configure out credentials. If you have not already, you will need to create an IAM user in AWS to get the secret key and access key.
To create an IAM user in the AWS Console, it’s best to find it by searching for “iam” or “users”.
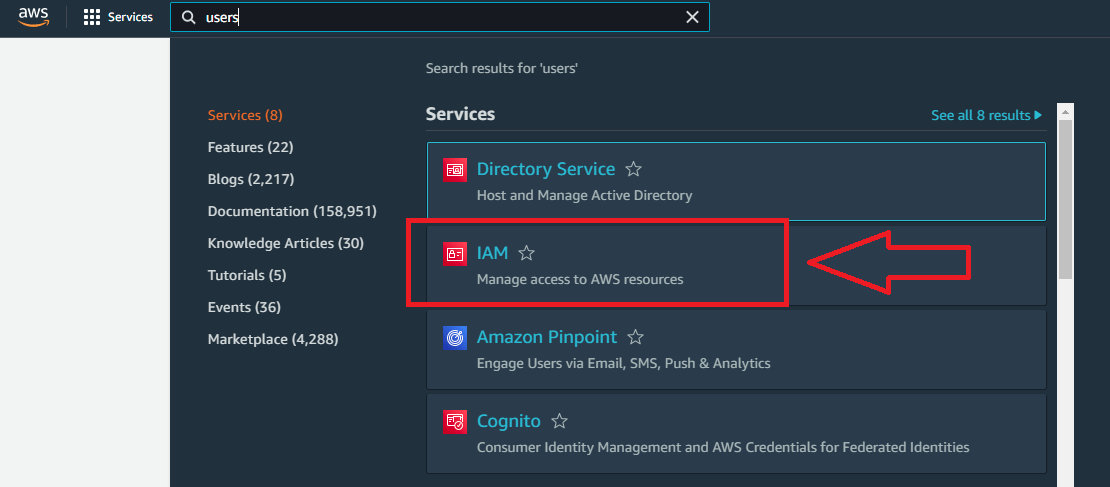
Next, click “Users” and then “Add User”.

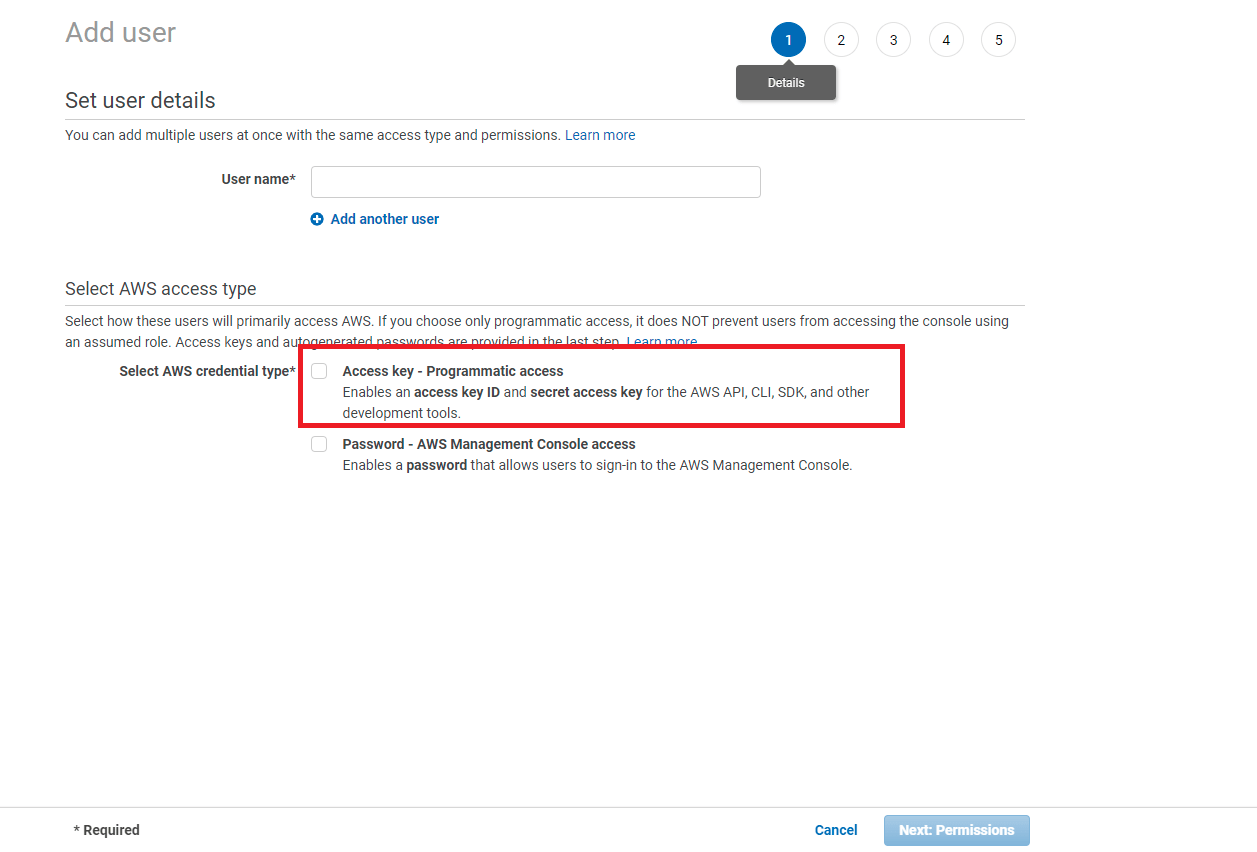
When creating a user it’s very important that we check the checkbox next to “Access Key – Programmatic access”.
Next, we take the credentials that we used from creating our IAM User and add them to serverless. To do this we need to execute the following at the terminal.
serverless config credentials –provider aws –key <aws access key> –secret <aws secret key>
For more details, here’s the AWS Config Credentials reference.
Adding Serverless As a Project Dependency
If you are starting a brand new project, it’s pretty easy to create a new project. Simply create a directory for the project and then change directory into it.
We can then run “serverless create” and if we pass a parameter of “–template aws-nodejs” we can automatically set up a lot of what’s needed.

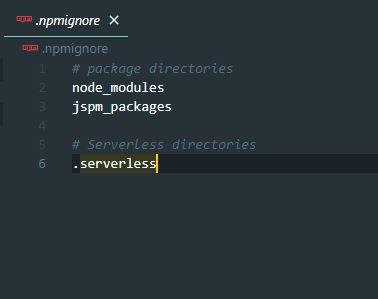
Running this command creates three files:
- .npmignore
- handler.js
- serverless.yml
.npmignore File
The .npmignore file is used to keep unwanted files out of an npm package. If there is no .npmignore file and there’s a .gitignore file then npm will ignore any files matched by the .gitignore file
The .npmignore file has the same structure – I usually just rename it to be .gitignore and start with it as my .gitignore file. If you aren’t sure what a gitignore file is, I have a blog article called Simple Git Ignore File For NodeJS that explains it.
handler.js File
The handler.js file contains our code for each function.

A best practice is to remove the majority of the code and put it into an external file that is then imported into the handler.
The serverless.yml file points to the handler.js file and what is being exported.
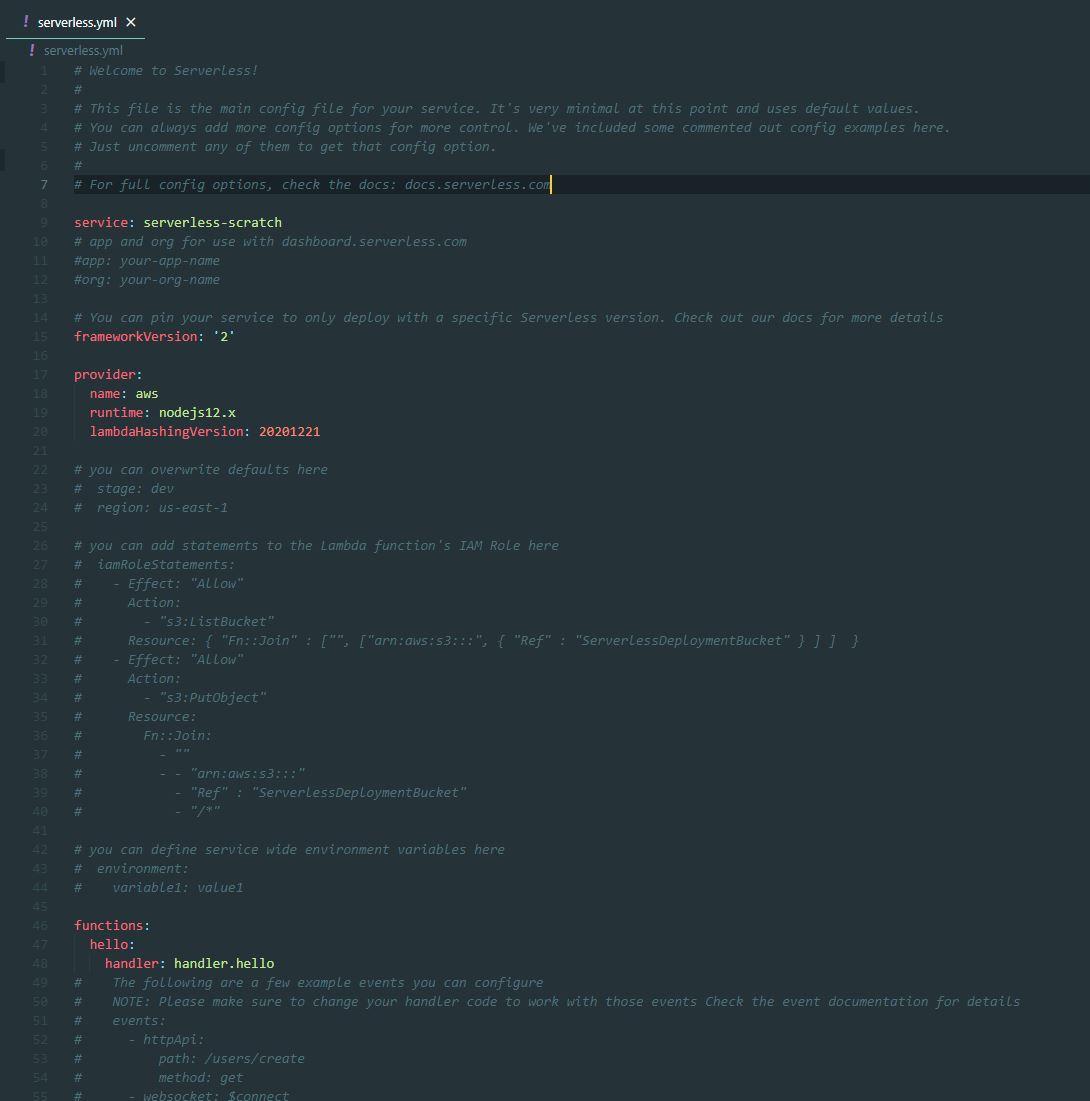
serverless.yml File
The serverless.yml file allows us to declare our functions in the service and how it will be deployed (plugins, events that trigger each function, resources, required, and etc.).
I then run npm init from the command prompt and just keep pressing enter to accept the defaults.
Setting up the serverless.yml file
When creating a serverless project, it’s a best practice to give it a meaningful name and keep in mind that one project can contain many functions. It’s usually best to think of it as a service amongst many services (ie: doing Microservices) instead of running a monolith.
I like to set my provider up like the following:

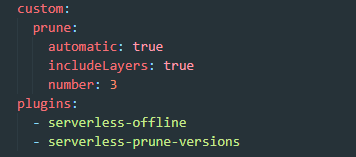
The main changes are setting defaults if no stage or region are passed in when doing deployments, setting environment variables in “{stageNameHere}.json” file that I don’t store in git.
I have also reduced the memory to be 256MB and will leave it at that until I’m certain there won’t be an impact. Although I haven’t done it yet I will usually set the logRetentionInDays to be 7 day once I’m ready to deploy to production. This is done in the provider section.
For debugging reasons and for the ease of developing locally, I will also usually use the plugin serverless-offline. You can read a lot more about serverless-offline in my blog post Running Serverless Framework Functions Locally
To keep my code relatively clean and help reduce costs a bit, I usually also include serverless-prune-versions.
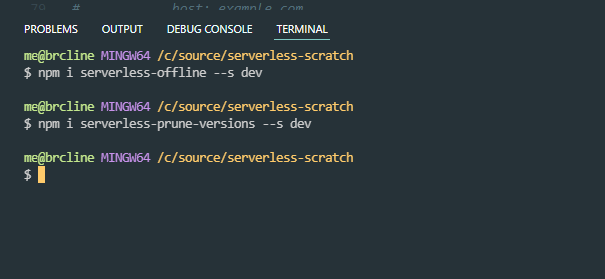
To add these to my project I will need to do this using npm. I do the following from the command line.
And then finally, I have to include the plugins in the serverless.yml file.
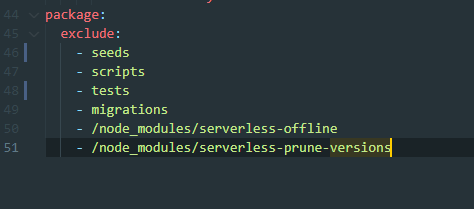
The serverless framework works by creating a zip and uploading it to the cloud provider, if your project is set up like mine you will likely end up with a folder structure that looks something like this:
- app (majority of my app logic)
- controllers
- middleware
- models
- routes
- migrations (database changes)
- node_modules
- tests
- seeds (inserting data into the database)
- scripts
- index.js (used for handler)
- package.json
- package-lock.json
- serverless.yml
The more things in the zip, the slower the lambda potentially loads so it’s important to exclude thins not needed from being located in the project when it is being deployed.
So at the very bottom of my project, I include the following:
And finally, I’ve changed the function to work off of http. I’ve made the following changes.
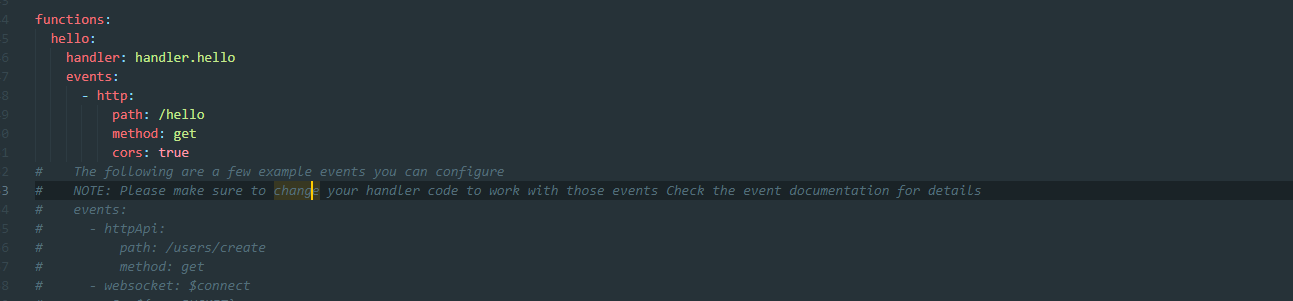
By adding the “events” parameter I’ve hooked it into http and given it a path of “/hello” and said that it should use the GET method. I usually add support for CORS for everything because I prefer to use Angular or React for a frontend and they break for anything not returning cors headers.
Running my function locally
To start my functions locally for testing, I then can run sls offline –stage dev –region us-east-1 like this:

I can then call the api manually using something like Postman

Wrapping It Up
In this blog post, we looked at setting up a very simple API using AWS lambda.


