
Authentication between two systems can be really difficult. There are a lot of different methods and strategies (Basic Authorization, oAuth, JWT, etc). Behind all of this complexity there’s generally an encoded or encrypted string that is returned.
JSON Web Tokens or JWT are an encoded string that can be safely used as part of a URL. The encoded string is made from two JSON objects (Header, Payload) and a string (Signature). From a high-level perspective, the JWT looks like this: header.payload.signature
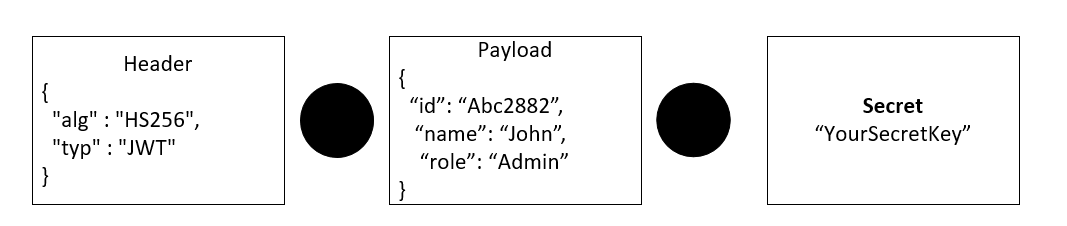
The Header
In a JSON Web Token (JWT), the header typically consists of two parts: the type of the token, which is JWT, and the signing algorithm being used, such as HMAC SHA256 or RSA.
The header indicates how the JWT is encoded and consists of a JSON object. The alg parameter specifies the signing algorithm, and the typ parameter indicates the token type.
The header is then Base64Url encoded to create the first part of the JWT. The second part of the JWT is the payload, which contains the claims. Claims are statements about an entity (typically, the user) and additional data. The third part of the JWT is the signature, which is used to verify that the sender of the JWT is who it says it is and to ensure that the message wasn’t changed along the way.
The three parts of the JWT are separated by dots (.), and the resulting string is the complete JWT.
The Payload
The payload or claims is the part of the JWT where all the user data is actually added. The claims in a JWT are encoded as a JSON object that is digitally signed using JSON Web Signature (JWS).
The payload of a JWT is the part of the token that contains the claims. Claims are statements about an entity (typically, the user) and additional data. There are three types of claims: registered, public, and private claims.
Registered claims are a set of predefined claims which are not mandatory but recommended, to provide a set of useful, interoperable claims. Some of the registered claims are:
- iss (issuer) claim identifies the principal that issued the JWT.
- sub (subject) claim identifies the principal that is the subject of the JWT.
- aud (audience) claim identifies the recipients that the JWT is intended for.
- exp (expiration time) claim identifies the expiration time on or after which the JWT must not be accepted for processing.
Public claims are claims that are defined by parties other than the IANA JSON Web Token Claims registry. These can be used to share information between parties that agree on using them and are neither registered nor private claims.
Private claims are custom claims that are used to share information between parties that have agreed on using them.
The payload of a JWT is represented as a base64Url encoded JSON object and is the second part of a JWT, following the header. An example of a JWT payload could be:
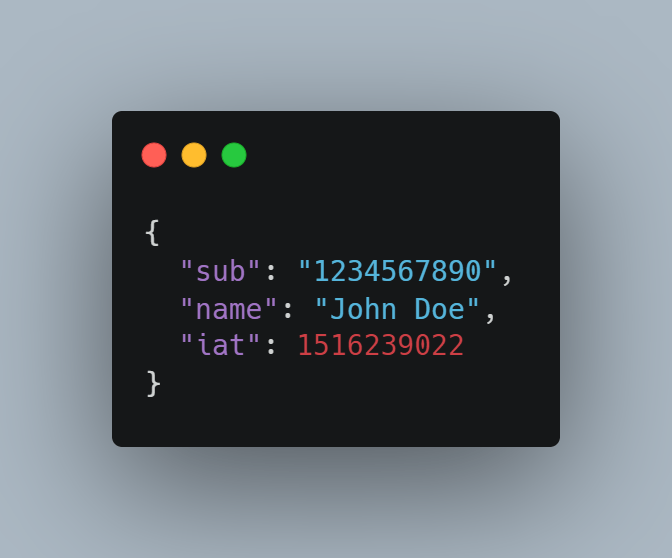
In this example, the payload contains three claims: a subject claim with a value of 1234567890, a name claim with a value of John Doe, and an issued at claim with a value of 1516239022.
The Signature
The third part of JWT is for verifying the token’s authenticity. You can use the signature to confirm that the token is valid and issued by a trusted provider.
We create the signature by signing the encoded header, the encoded payload, a secret, and the algorithm specified in the header. For example, if you use the HMAC SHA256 algorithm, the signature is created using a secret key to hash the combination of the encoded header and payload.
The JWT is then transmitted as a JSON object, with the three parts separated by dots (.). The three parts are the encoded header, encoded payload, and the signature, respectively.
For example, a JWT might look like this: eyJhbGciOiJIUzI1NiIsInR5cCI6IkpXVCJ9.eyJzdWIiOiIxMjM0NTY3ODkwIiwibmFtZSI6IkpvaG4gRG9lIiwiaWF0IjoxNTE2MjM5MDIyfQ.SflKxwRJSMeKKF2QT4fwpMeJf36POk6yJV_adQssw5c.
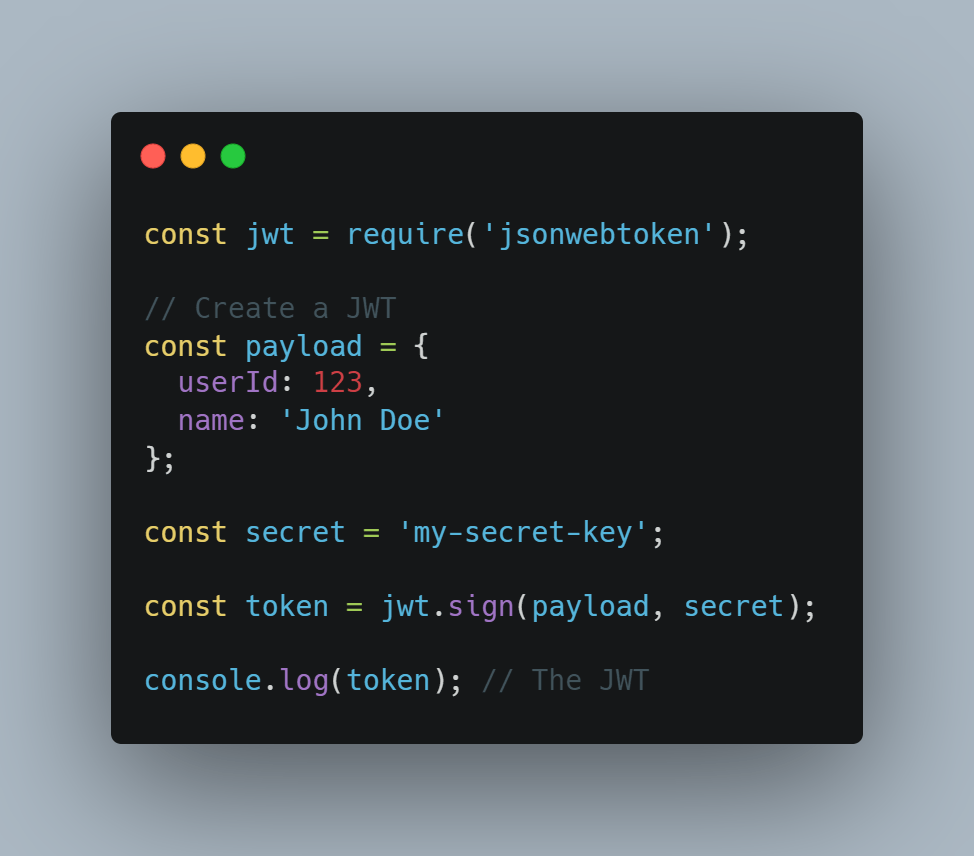
Creating a JWT In Node.js
To create and validate JWTs in Node.js, you can use the jsonwebtoken library.
To use it, we need to install it using npm.

Here’s an example of how to create a JWT:
Validating a JWT
To validate a JWT, you can use the verify method:

Security Reminder
It’s important to keep in mind that JWTs are not encrypted, so you should not store sensitive information in the JWT payload. Instead, you should use the JWT to store a unique identifier or other information that can be used to look up the sensitive information on the server.
You can also specify additional options when creating a JWT, such as the expiration time or the algorithm used to sign the JWT. For more information, you can refer to the documentation for the jsonwebtoken library.
Wrapping it Up
In this blog article, we covered what a JSONWeb Token (JWT) is, how to create a JWT, and how to verify a JWT.
My blog post series on APIs provides more context on using JWTs during requests.
Also published on Medium.


